Why Won’t My Car’s Cigarette Lighter Work? A Handy Guide for Drivers

In today’s fast-paced world, a malfunctioning cigarette lighter in your car can be more than just an inconvenience. Whether you’re a car owner who relies on it to charge your phone or a smoker who needs a quick light, a non-functional cigarette lighter can disrupt your routine.

This blog post will explore the common problems associated with car cigarette lighters, offer practical solutions, and help you understand when it’s time to seek professional assistance. By the end of this guide, you’ll be equipped with the know-how to address these issues efficiently.

Call 317-475-1846 For Affordable Car Cigarette Lighter Repair in Indianapolis

Understanding the Versatile Role of the Cigarette Lighter

The cigarette lighter in your car serves multiple purposes beyond lighting cigarettes. It’s a convenient source for powering various devices, especially for those who spend long hours on the road. Understanding its importance can help highlight why addressing any issues promptly is crucial.

Many drivers use their car’s cigarette lighter socket to charge phones, tablets, iPods, and GPS devices. It’s a vital component for anyone who needs to stay connected while traveling. Additionally, it can power portable air compressors, coolers, and other small gadgets, making road trips more enjoyable.

For smokers, the cigarette lighter is a convenient tool. When it stops working, it can be frustrating, and if you’re using it to charge essential devices, the inconvenience can be even greater. Recognizing its significance can prompt timely maintenance and repairs.

How the Cigarette Lighter Works

To effectively troubleshoot a malfunctioning cigarette lighter, it’s essential to understand its basic operation. The cigarette lighter in your car comprises several components that work together to provide power to your devices.

The central component of the cigarette lighter is the socket, which receives power from your car’s electrical system. When you insert a compatible plug, such as a phone charger, it completes the circuit, allowing electricity to flow.

Another crucial part is the fuse, which protects the electrical system from overloads. If the circuit draws too much current, the fuse will blow, cutting off power to the socket to prevent damage. Understanding these components is the first step in diagnosing issues.

Common Issues With Car Cigarette Lighting Devices

There are several reasons why your car’s cigarette lighter might not be working. Identifying the root cause is the key to fixing the problem effectively. One common culprit is a blown fuse. If your cigarette lighter suddenly stops working, a blown fuse is often the first thing to check. The fuse may have blown due to a power surge or using a device that draws too much current.

Another possibility is faulty wiring. Over time, wires can become loose, corroded, or damaged, disrupting the connection. Inspecting the wiring around the socket may reveal visible issues that need fixing. In other cases, a damaged socket can also be the cause. Continuous use and wear and tear can lead to a malfunctioning socket. This might involve broken contacts or foreign objects lodged inside, preventing proper connectivity.

Troubleshooting Steps

If your cigarette lighter is not functioning, there are several steps you can take to diagnose and potentially fix the issue. Here’s a simple guide to get started:

  • Check the Fuse: Locate your car’s fuse box (often found under the dashboard) and identify the fuse linked to the cigarette lighter. Remove and inspect the fuse. If it’s blown, replace it with one of the same amperage.
  • Test the Socket: Use a multimeter to check for voltage at the socket. If there’s no voltage, the issue might be deeper in the electrical system, but if there is, the socket may need cleaning or replacement.
  • Inspect the Wiring: Examine the wiring for any signs of damage. If you’re comfortable working with electrical components, you might attempt to fix minor issues yourself. However, exercise caution to avoid any risk of electric shock.

Knowing When to Seek Professional Help

Sometimes, the issues with your cigarette lighter might go beyond a simple DIY fix. Knowing when to call in a professional can save you time and prevent further damage. If your troubleshooting efforts don’t resolve the problem, it’s advisable to consult a professional mechanic. They have the tools and expertise to diagnose complex electrical issues that may be affecting your car’s cigarette lighter.

Additionally, if you’re uncomfortable working with electrical systems, it’s always safer to seek help. A professional can ensure the repairs are done correctly and safely, giving you peace of mind and preventing potential hazards.

Exploring Alternatives and Upgrades

While addressing the non-functional cigarette lighter, it’s worth considering alternative charging methods. There are several options available that can keep you connected on the go.

One popular alternative is the aftermarket USB charger. These devices fit into the cigarette lighter socket and offer multiple USB ports for charging various gadgets simultaneously. They’re a convenient and efficient upgrade.

Another option is investing in a dedicated car power inverter. This device converts the car’s DC power into AC power, allowing you to plug in devices requiring a standard wall outlet. It’s ideal for charging laptops or other higher-power devices.

Final Thoughts

In conclusion, addressing issues with your car’s cigarette lighter is essential for maintaining convenience and connectivity on the road. By understanding its importance, troubleshooting common problems, and knowing when to seek professional help, you can ensure a functional and reliable power source.

Regular maintenance and occasional upgrades can enhance your car’s utility and keep you prepared for any situation. Whether you’re charging your phone or powering a portable cooler, a working cigarette lighter can make all the difference.

For those who want to learn more or need assistance, consider visiting a local auto repair shop. They offer expert guidance and solutions, ensuring your car remains in optimal condition.

If your car lighter or other electrical components in your vehicle are unreliable, we can help. Contact Northeast Auto Service at 317-475-1846 and book a maintenance service and take the first steps toward a more assured and effortless automotive experience.

Related Posts:

How to Diagnose and Solve Common Auto Electrical Problems
How Much Does Alternator Repair Cost?
Common Causes for Parasitic Draw in Automotive Batteries

Stop the Drip: A Guide to Identifying and Fixing Common Car Leaks

For car owners, nothing is as unsettling as discovering a mysterious puddle beneath your vehicle. Car leaks are more than just an inconvenience; they can indicate underlying issues that, if left unattended, could lead to significant repairs down the road. Whether you’re a veteran car enthusiast or simply want to keep your vehicle in good condition, knowing about common car leaks and how to fix them is essential.

In this guide, we’ll walk you through the most frequent car leaks, including engine oil, transmission fluid, coolant, and water. You’ll learn how to identify these leaks, understand their causes, and discover practical solutions. By the end, you’ll be equipped with essential car maintenance tips to keep your vehicle in top shape. Let’s get started.

Call 317-475-1846 For Car Leak Repair in Indianapolis Indiana

Why It’s Crucial to Identify and Fix Car Leaks

When it comes to car maintenance tips, identifying and fixing leaks should be at the top of your list. Leaks can threaten the longevity and performance of your vehicle. Ignoring them can lead to costly repairs or, worse, render your car undrivable.

Firstly, leaks often signal a loss of essential fluids that keep your engine and other components functioning optimally. Without these fluids, parts can overheat, seize up, or degrade, leading to expensive replacements. For instance, an engine oil leak can reduce lubrication, causing engine components to grind against each other.

Secondly, some leaks can pose a safety hazard. Transmission leaks, for example, can affect gear shifting, making driving unpredictable and dangerous. Similarly, coolant leaks can lead to overheating, potentially causing your engine to shut down unexpectedly. Therefore, understanding how to identify car leaks is not just about maintenance; it’s also about ensuring your safety on the road.

Finally, timely detection and repair of leaks can save you money in the long run. Addressing a minor leak immediately prevents it from escalating into a significant problem. Regular inspections mean you’re less likely to encounter breakdowns, allowing you to budget more effectively for routine maintenance rather than unexpected repairs.

Overview of Common Automotive Leaks

Car leaks come in various forms, each with distinct characteristics and implications. By familiarizing yourself with these types of leaks, you can quickly determine the severity and necessary action, facilitating better car maintenance practices. Here are the most common automotive leaks to watch out for:

  • Engine Oil Leak: One of the most common types of car leaks, an engine oil leak can be identified by dark brown or black spots under your vehicle. This leak is often due to worn-out gaskets or seals and can lead to engine damage if not addressed promptly.
  • Transmission Fluid Leak: Transmission fluid is vital for smooth gear shifts. Its leak is usually marked by reddish-brown spots or puddles. Leaks can occur due to damaged seals or loose pan bolts and can severely impact your vehicle’s drivability.
  • Coolant Leak: Coolants are typically green, orange, or pink and have a sweet smell. Coolant leaks are often spotted near the front of the car and can result from a cracked radiator, loose hose clamps, or a failed water pump. Left unchecked, an overheating engine can cause significant damage.
  • Water Leak: Unlike other leaks, a water leak is usually harmless and typically results from air conditioning condensation. However, it’s important to ensure that it’s not confused with other fluid leaks.

Engine Oil Leaks

Engine oil is the lifeblood of your car’s engine. It lubricates moving parts, reduces friction, and helps regulate temperature. When an engine oil leak occurs, it compromises all these functions, potentially leading to engine wear or failure.

Identifying an engine oil leak is relatively straightforward. Look for dark brown or black spots on your driveway or garage floor. Oil leaks often originate from the oil pan, valve cover gaskets, or oil filter, especially if these components are worn or improperly sealed. Another tell-tale sign is a burnt oil smell, particularly after a drive when the engine is warm.

The causes of engine oil leaks can vary. Worn-out gaskets, degraded seals, or loose oil pan bolts are common culprits. Driving with insufficient oil levels due to a leak can cause the engine to overheat and damage internal parts, leading to costly repairs.

To address engine oil leaks, start by inspecting the oil pan and filter for any visible damage or looseness. Tighten any loose bolts and replace worn gaskets and seals. Always ensure you’re using the correct oil grade as specified by your vehicle manufacturer, and consider regular oil changes as part of your car maintenance routine to prevent future leaks.

Transmission Fluid Leaks

Transmission fluid is essential for smooth gear operation and protecting the transmission components from heat and wear. A transmission leak can quickly escalate from a minor inconvenience to a major repair if ignored.

Spotting a transmission fluid leak involves looking for reddish-brown fluid underneath your vehicle. This fluid may have a slightly sweet or burnt smell. Leaks typically occur around the transmission pan, seals, or cooler lines, especially if these components are damaged or improperly tightened.

Causes of transmission leaks include worn or cracked seals, loose pan bolts, or a failing transmission cooler line. If left unaddressed, a transmission leak can lead to slippage, hard shifting, or even total transmission failure, which is both costly and time-consuming to repair.

To fix a transmission leak, inspect the seals and pan for any signs of wear or damage. Tighten any loose bolts and replace damaged seals or lines. Ensure you use the correct type and amount of transmission fluid recommended by your vehicle’s manufacturer. Regularly checking the transmission fluid level and condition is a crucial part of proactive car maintenance.

Coolant Leaks

Coolant, or antifreeze, is vital for preventing your engine from overheating. It circulates through your engine, absorbing excess heat and dissipating it through the radiator. A coolant leak can quickly lead to overheating, causing serious engine damage.

To identify a coolant leak, look for green, orange, or pink puddles under your vehicle. Coolant often has a distinct sweet smell. Leaks commonly occur at the radiator, hoses, water pump, or head gasket. Any unusual rise in temperature on your dashboard gauge is also a warning sign of a coolant issue.

Common causes of coolant leaks include a cracked radiator, loose hose clamps, or a failing water pump. Ignoring a coolant leak can lead to engine overheating, warped parts, or even a blown head gasket, resulting in extensive repairs.

To address a coolant leak, start by inspecting the radiator and hoses for visible damage or looseness. Tighten or replace any faulty components. Always ensure your coolant level is within the recommended range and is replaced according to your vehicle’s maintenance schedule. Using the correct type of coolant for your vehicle is also crucial for preventing leaks and maintaining engine health.

Water Leaks

Water leaks in cars are typically less concerning as they often result from condensation, especially when the air conditioning is in use. However, distinguishing between harmless water leaks and more serious fluid leaks is important.

Water leaks are usually clear and odorless. They often form small puddles under the passenger side of the car, directly beneath the air conditioning system. These leaks are normal during warm weather when condensation forms and drips away as part of the cooling process.

While water leaks from condensation are harmless, it’s essential to ensure they are not confused with other fluid leaks like brake fluid or coolant, which can be clear under certain conditions. Any unusual noise from the air conditioning system or reduced cooling efficiency might also warrant further inspection.

To confirm a water leak from condensation, start your car and turn on the air conditioning. Check for water drips after a few minutes of running. If no other symptoms are present, this is likely just regular condensation. However, if you suspect a different type of leak or notice any performance issues, consult a professional mechanic for a thorough assessment.

How to Prevent Automotive Leaks

Preventing car leaks is all about proactive car maintenance and regular inspections. By keeping an eye on your vehicle’s health, you can address potential issues before they turn into costly repairs. One of the best prevention strategies is routine vehicle inspection. Check under your car regularly for any signs of fluid leaks. Pay attention to dashboard warning lights, unusual smells, or changes in vehicle performance, as these can indicate early signs of a leak.

Regular maintenance is another key to preventing leaks. This includes timely oil changes, transmission fluid checks, and coolant replacements. Always use the fluids recommended by your vehicle’s manufacturer and ensure they are topped up to the correct levels.

Finally, tackle small issues before they become big problems. If you notice any signs of a leak, address it immediately. Tighten loose components, replace worn seals, and consult a mechanic if necessary. Investing time in preventive maintenance ensures your vehicle remains reliable and efficient for years to come.

Conclusion

Car leaks are a common concern for vehicle owners but understanding and addressing them promptly can save you a lot of trouble and expense. By learning to identify different types of leaks, such as engine oil, transmission fluid, coolant, and water, you can take swift action to prevent further issues.

Regular maintenance and inspections are crucial in preventing leaks and ensuring your vehicle runs smoothly. Don’t wait for a small drip to turn into a costly repair. If you suspect a leak, take action today by scheduling a maintenance check with a trusted mechanic. By staying informed and proactive, you can enjoy a safer and more reliable driving experience.

Are you ready to book your winter automotive service with a dependable Indianapolis mechanic? Contact Northeast Auto Service at 317-475-1846 for ASE licensed and trained factory scheduled maintenance and car inspections in Indianapolis, Indiana. We work on all make and model vehicles!

Related Posts:

Understanding Automotive Vacuum Leaks and How to Address Them
10 Common Reasons Your Check Engine Light is On
How to Tell If It’s Time for an Oil Change: 10 Warning Signs

Brake Safety Starts Here: Simple Steps to Ensure Your Car Stays Safe on the Road

Every time you hit the road, your car’s braking system plays a crucial role in keeping you safe. Whether you’re a daily commuter navigating busy city streets or an adventurous road trip enthusiast, understanding car brake safety is vital.

In this comprehensive guide, we’ll explore everything from the basics of car brakes to the latest technological advancements in braking systems. By the end of this blog, you’ll have a thorough understanding of brake safety tips, maintenance practices, and what to do when issues arise. Let’s drive into it!

Call 317-475-1846 For Affordable Car Brake Services in Indianapolis Indiana

The Importance of Brake Safety for Every Driver

Brake safety is not just a concern for race car drivers or those who frequently drive in challenging conditions. It’s a fundamental aspect of safe driving for everyone. Car brakes are your first line of defense against accidents, helping you maintain control in various situations. The ability to stop effectively can mean the difference between avoiding a collision and experiencing one.

For daily commuters and safety-conscious drivers alike, understanding how your brakes work and recognizing signs of potential issues is paramount. Being proactive about brake safety not only protects you and your passengers but also contributes to safer roads for everyone. With routine brake inspections and proper maintenance, you can ensure that your car’s braking system remains in top condition, providing peace of mind during every drive.

Understanding the Basics of Car Brakes

To truly appreciate the importance of brake safety, it’s helpful to understand how car brakes function. The braking system consists of several key components, each playing a vital role in bringing your car to a stop. The most common types of brakes found in vehicles today are disc brakes and drum brakes.

Disc brakes, which are more prevalent in modern vehicles, use brake pads to squeeze a rotor, creating the friction needed to stop. On the other hand, drum brakes use brake shoes to press outward against a spinning drum. Both systems rely on hydraulic pressure to transfer force from the brake pedal to the brakes themselves. Additionally, calipers are an essential component of disc brakes, as they house the brake pads and apply the necessary pressure.

Another crucial aspect of your car’s braking system is the parking brake, also known as the hand brake. Unlike the main brakes, the parking brake is designed to hold your car in place when parked, adding an extra layer of safety on slopes. Understanding these basic elements of car brakes allows you to better appreciate their significance and prioritize their maintenance.

Signs Your Brakes Need Attention

Recognizing the signs of brake failure early can prevent more serious issues from developing. Some warning signs are obvious, while others might be more subtle. One common sign that your brakes need attention is a squeaking or grinding noise when you apply the brakes. This often indicates that your brake pads are worn and may need replacement.

Another symptom to watch for is a vibration or pulsation in the brake pedal when braking. This can suggest warped rotors, which require immediate attention to maintain effective braking performance. If you notice your car pulling to one side when you brake, it could be a sign of uneven brake pad deterioration or a problem with the calipers.

Additionally, a soft or spongy brake pedal is a red flag, indicating potential issues with the brake fluid or air in the brake lines. Regularly inspecting your brakes and addressing these issues promptly can help prevent more costly repairs down the line and ensure your safety on the road.

Maintenance Tips for Better Brake Safety

Maintaining your car’s brakes is essential for ensuring optimal performance and safety. One of the most important brake maintenance tasks is regular brake inspections. By checking your brakes at least twice a year, you can catch any potential problems early and address them before they worsen. During these inspections, pay close attention to the thickness of your brake pads, as thin pads can lead to reduced stopping power.

Brake fluid is another critical component that requires periodic attention. Over time, brake fluid can absorb moisture, leading to decreased effectiveness. To ensure your braking system functions properly, replace the brake fluid according to your vehicle manufacturer’s recommendations.

Lastly, don’t forget about your parking brake. Regularly test and adjust it to ensure it holds your car securely when parked. Proper maintenance of your car’s brakes not only extends their lifespan but also promotes safe driving for you and others on the road.

The Evolution of Car Brake Technology

Car brake technology has come a long way since the early days of motoring. From mechanical drum brakes to advanced electronic systems, innovations continue to enhance braking performance and safety. One significant advancement is the introduction of anti-lock braking systems (ABS). ABS prevents wheel lockup during sudden stops, allowing drivers to maintain steering control and avoid skidding.

Another groundbreaking development is electronic stability control (ESC), which works alongside ABS to help vehicle stability by automatically adjusting brake force to individual wheels. ESC is particularly helpful in preventing rollover accidents and maintaining control during sharp turns.

Today, many cars also feature brake assist systems, which detect emergency braking situations and automatically apply maximum brake force to reduce stopping distance. These technological advancements in car brakes demonstrate the importance of staying informed about safety features when purchasing and maintaining a vehicle.

FAQs on Brake Safety Answered

Why does my car make a squealing noise when I brake? 

Squealing brakes are often caused by worn brake pads. When the pads are too thin, they can create a high-pitched noise as they come into contact with the rotor. It’s essential to replace the brake pads promptly to prevent damage to the rotors.

How often should I get my brakes inspected? 

It’s recommended to inspect your brakes at least twice a year, or more frequently if you notice any signs of brake failure. Regular inspections help identify potential issues early and ensure your brakes function optimally.

What should I do if my brake pedal feels soft? 

A soft brake pedal may indicate air in the brake lines or a problem with the brake fluid. It’s crucial to have your brakes checked by a professional to diagnose and resolve the issue, ensuring your safety on the road.

On The Road Ahead

Ensuring your car’s brakes are in top condition is a responsibility every driver should take seriously. Brake safety is not only vital for your well-being but also for the safety of others sharing the road. By understanding the basics of car brakes, recognizing signs of trouble, and prioritizing regular maintenance, you can significantly reduce the risk of brake failure and accidents.

Remember, staying informed about the latest advancements in brake technology can help you make better decisions when purchasing a vehicle or upgrading your current one. Investing in professional brake inspections and maintenance is a small price to pay for peace of mind and road safety.

For those seeking expert advice and assistance, consider scheduling a professional brake inspection. Certified technicians can provide valuable insights and ensure your car’s braking system is operating at its best. Prioritize brake safety today and enjoy safer, worry-free driving tomorrow.

Looking for affordable car maintenance and repair for brakes and more? Contact Northeast Auto Service at 317-475-1846 for professional automotive service and repair for car brakes in Indianapolis, Indiana. Request a free estimate, or schedule service, today.

Related Posts:

How to Know When it’s Time to Replace Your Car Brakes
10 Tips for Keeping Your Brakes in Good Condition
Top 4 Signs of Failing Car Brakes

Foggy Car Windows: Solutions for Safe and Clear Driving

Driving with foggy car windows can be more than just an inconvenience; it’s a safety hazard. Blurred vision can lead to accidents, especially in tricky weather conditions like rain or snow. This post aims to uncover the causes and solutions for foggy car windows, ensuring you drive safely and confidently. By the end, you’ll have a toolkit of tips and techniques to keep your windows clear and your vision sharp.

Call 317-475-1846 When You Need Routine Automotive Service in Indianapolis

What Causes Foggy Car Windows?

Before we can solve the problem, it’s important to understand what causes car window fogging. Essentially, fog is created when warm, moist air inside your car comes into contact with the cold glass of your windows. This phenomenon is similar to what happens when you breathe on a cold mirror. The moisture in the air condenses, forming a misty layer that impairs visibility.

Temperature plays a major role in this process. When the temperature inside your car is warmer than the outside air, it creates the perfect environment for condensation. Humidity is another factor. On rainy days, the moisture level inside your car increases, making fogging even more likely. Understanding these factors can help you take preventive measures.

Awareness of this science can guide you in selecting the right solutions. Whether it’s adjusting your air conditioning settings or choosing the right products, knowing how fog forms is the first step to effectively managing it.

Preventing Window Fog in Vehicles

Preventing fog before it starts is always the best strategy. One of the simplest ways to do this is by improving ventilation inside your car. Cracking a window open slightly can equalize the temperature and reduce humidity. This helps to circulate the air and lessen the likelihood of condensation forming on the windows.

Another effective method involves using desiccants. These are materials that absorb moisture. You can place silica gel packets inside your car to soak up excess humidity. They’re inexpensive and readily available, making them a practical addition to your anti-fog toolkit.

Maintaining an ideal temperature inside your car can also prevent fogging. Keep your environment neither too hot nor too cold. Striking a balance with your car’s climate control system can help maintain clear windows. Using the air conditioning in the cooler months can also help by removing moisture from the air inside the cabin.

Commercial Products to Consider

A variety of commercial products are designed specifically to prevent window fogging. Defogging sprays are among the most popular. They work by creating a thin, invisible film on the glass that resists moisture buildup. These sprays can be found at most auto supply stores and are easy to apply.

Another option is anti-fog wipes. Like sprays, they leave a protective layer on the glass. They’re convenient for quick applications and can be stored in your glove compartment. Keep some handy for on-the-go maintenance.

Lastly, consider investing in a good-quality window cleaner. Regularly cleaning your windows helps remove any residue that moisture can cling to. It’s essential to start with a clean surface for any of these products to work effectively.

DIY Solutions for Clearing Fog

For those who prefer homemade solutions, there are several DIY methods to try. A vinegar-water solution is a popular choice. Mixing vinegar with water in a spray bottle and applying it to your windows can help reduce fogging. Vinegar acts as a natural defogger and can also clean the glass.

A mixture of dish soap and water can be used in a similar way. Apply a small amount to a cloth and wipe your windows. This method works by leaving a thin film that prevents moisture from forming droplets.

Another easy DIY trick is using shaving cream. Apply a small amount to your windows, then wipe it off with a clean cloth. The shaving cream creates a barrier that helps keep fog at bay.

Long-Term Maintenance for Clear Windows

Regular maintenance is key to keeping your car windows clear in the long term. Regularly cleaning the interior of your car, including the windows, can prevent fog from forming. Dust and residue can provide a surface for moisture to cling to, so keeping things clean can make a big difference.

Checking and replacing your cabin air filters is another vital step. These filters play a significant role in air circulation inside your car. A clogged filter can trap moisture and increase the humidity levels inside your car. Replacing them regularly ensures efficient airflow.

Lastly, keeping your car dry is crucial. Wipe down wet surfaces and remove damp items like umbrellas or wet clothing. Even small amounts of moisture can contribute to fogging, so managing them is an important preventative measure.

Conclusion

Foggy car windows are more than just a nuisance—they pose a real safety risk. Fortunately, there are many ways to combat this issue, from using commercial defogging products to implementing DIY solutions. Regular maintenance, such as cleaning windows and replacing air filters, can offer long-term benefits.

By understanding the causes of window fogging and applying these tips, you can ensure clear visibility every time you drive. For ongoing support and professional assistance, consider contacting your local auto repair shop for routine car maintenance. Stay safe and drive with confidence.

Want to just skip the hassle of searching around for trusted auto repair businesses in the Indy area? Good – because you are already in the right spot! Call Northeast Auto Service at 317-475-1846 for superior, ASE licensed auto repair and service in Indianapolis, Indiana. We service all make and model vehicles.

Related Posts:

How to Make Your Own Windshield Wiper Deicer
4 Automotive Hacks That Will Improve Driving Safety
Top Car Care Tips for Road Trips

When Your Car’s Sensors Go Haywire: What You Need to Know and How to Fix It

Imagine driving down the highway when suddenly, your car’s dashboard lights up like a Christmas tree. Is it the engine? The tires? Chances are, it’s a sensor glitch. In today’s high-tech vehicles, sensors play a crucial role in monitoring everything from tire pressure to engine performance.

These tiny components collect and relay vital information to your car’s onboard computer, ensuring a smooth and safe ride. But what happens when these sensors go haywire? This blog post dives into sensor technology in cars, common types, causes of glitches, and how to fix them, making it a must-read for every car owner.

Call 317-475-1846 For Affordable Car Sensor Repair and Replacement in Indianapolis Indiana

Common Sensor Types and Their Functions

Engine Control Unit (ECU) Sensors

The Engine Control Unit (ECU) is the brain of your car. It relies on various sensors to optimize engine performance. These include oxygen sensors, which measure the amount of unburned oxygen in the exhaust, and mass airflow sensors, which monitor the air entering the engine. Both are critical for maintaining fuel efficiency and reducing emissions.

Tire Pressure Monitoring System (TPMS)

No one likes a flat tire, and that’s where the Tire Pressure Monitoring System (TPMS) comes in. These sensors continuously check tire pressure and alert you when it drops below a safe level. Properly inflated tires not only improve fuel efficiency but also enhance vehicle safety.

Anti-lock Braking System (ABS) Sensors

The Anti-lock Braking System (ABS) sensors are essential for safe braking. They monitor wheel speed and prevent the wheels from locking up during sudden stops, thereby maintaining traction and stability. A malfunctioning ABS sensor can lead to reduced braking efficiency and increased stopping distances.

Understanding Sensor Glitches Causes and Signs

Environmental Factors

Extreme temperatures, moisture, and road salt can wreak havoc on your car’s sensors. These environmental factors can cause corrosion or damage to the sensors, leading to inaccurate readings or complete failure.

Electrical Issues

Faulty wiring, loose connections, or blown fuses can disrupt the communication between sensors and the vehicle’s computer system. Electrical issues are often the root cause of sensor glitches, leading to erratic behavior and false alerts on your dashboard.

Wear and Tear

Like any other component, sensors degrade over time due to regular wear and tear. Older vehicles are more susceptible to sensor glitches because the sensors may have exceeded their lifespan, resulting in unreliable performance.

The Impact of Sensor Glitches on Vehicle Performance and Safety

Reduced Fuel Efficiency

When certain types of sensors, such as the oxygen sensor or mass airflow sensor, begin to malfunction, they can send inaccurate data to the ECU. This can result in an improper air-fuel mixture, causing the engine to run rich or lean, ultimately reducing fuel efficiency.

Compromised Safety Features

Sensor glitches can affect safety features like the ABS and TPMS. A faulty ABS sensor may cause the brakes to lock up, while a malfunctioning TPMS can lead to unsafe driving conditions due to underinflated tires.

Increased Repair Costs

Ignoring sensor glitches can lead to more significant issues down the line, resulting in costly repairs. For example, a faulty oxygen sensor can damage the catalytic converter, an expensive component to replace.

How to Diagnose and Fix Sensor Glitches

Using an OBD-II Scanner

An OBD-II scanner is a valuable tool for diagnosing sensor glitches. By plugging it into your car’s OBD-II port, you can retrieve diagnostic trouble codes (DTCs) that indicate which sensors are malfunctioning. This information can help you pinpoint the problem and take appropriate action.

Visual Inspection

A visual inspection can reveal obvious issues like damaged wiring, loose connections, or corroded sensors. Addressing these problems can often resolve sensor glitches and restore normal operation.

Professional Help

If you can’t diagnose or fix the issue yourself, it’s best to consult a licensed mechanic. They have the expertise and specialized equipment to identify and repair sensor-related problems, ensuring your vehicle runs smoothly and safely.

Preventative Maintenance Tips to Avoid Sensor Issues

  • Regular Inspections – Routine inspections can help identify potential sensor issues before they become major problems. Check your sensors and related wiring for signs of wear, corrosion, or damage during regular maintenance.
  • Keep It Clean – Keeping your sensors clean can prevent glitches caused by dirt and debris. For example, cleaning the mass airflow sensor and oxygen sensor can improve their performance and extend their lifespan.
  • Timely Replacements – Replacing sensors at recommended intervals can prevent unexpected failures. Refer to your vehicle’s manual for guidance on when to replace specific sensors and adhere to these recommendations to maintain optimal performance.

Future of Sensor Technology in Automobiles

Advancements in AI and Machine Learning

The future of sensor technology in automobiles is bright, with advancements in AI and machine learning leading the way. These technologies can enhance sensor accuracy and enable predictive maintenance, allowing vehicles to anticipate and address potential issues before they occur.

Integration with IoT

The Internet of Things (IoT) is transforming how vehicles communicate with each other and their surroundings. IoT-enabled sensors can provide real-time data on traffic conditions, road hazards, and vehicle performance, improving safety and efficiency.

Enhanced Safety Features

Future sensor technologies will continue to enhance vehicle safety features. Innovations like advanced driver assistance systems (ADAS) rely on sensors to provide real-time data, enabling features like adaptive cruise control, lane-keeping assist, and automatic emergency braking.

Conclusion

Sensor glitches in cars can be a nuisance, but understanding their causes and knowing how to diagnose and fix them can save you time, money, and stress. Regular maintenance and timely replacements can prevent many sensor issues, ensuring your vehicle runs smoothly and safely. If you encounter persistent sensor glitches, don’t hesitate to seek professional help from a licensed mechanic. By staying proactive and informed, you can enjoy a safer, more efficient driving experience.

To learn more about keeping your car in top condition, book a consultation with an automotive expert ASAP! Contact Northeast Auto Service at 317-475-1846 for ASE licensed and trained factory scheduled maintenance and car inspections in Indianapolis, Indiana. We work on all make and model vehicles!

Related Posts:

Navigating Car Sensor Issues: Tips and Tricks
How to Diagnose and Solve Common Auto Electrical Problems
10 Common Reasons Your Check Engine Light is On

Understanding Automotive Vacuum Leaks and How to Address Them

Vacuum leaks in your car’s engine can be a sneaky troublemaker. Often overlooked, these leaks can significantly impact your vehicle’s performance and fuel efficiency. In this comprehensive guide, we’ll explore everything you need to know about automotive vacuum leaks, from identifying the signs to taking preventive measures.

Call 317-475-1846 For Affordable Vacuum Leak Repair in Indianapolis Indiana

Introduction to Automotive Vacuum Leaks

A vacuum leak occurs when there is an unintended opening in the vacuum system of your car’s engine, allowing air to get in. This can disrupt the air-fuel mixture, leading to various engine problems. Identifying and repairing vacuum leaks is crucial for maintaining optimal engine performance. Ignoring them can lead to more severe issues, including engine failure.

Signs and Symptoms of Vacuum Leaks

Engine Performance Indicators

  • Rough Idling: If your engine is idling erratically, it might be due to a vacuum leak.
  • Stalling: Sudden stalling can also be a symptom.

Vehicle Behavior Changes

  • Decreased Fuel Efficiency: Notice that your car is guzzling more gas than usual? A vacuum leak could be the culprit.
  • Poor Acceleration: Struggling to accelerate smoothly? This is another common sign.

General Causes of Vacuum Leaks

Understanding the root causes of vacuum leaks is essential for effective troubleshooting and maintenance. A vacuum leak can originate from various sources within the engine’s vacuum system. These leaks often develop over time due to wear and tear, environmental factors, and the natural degradation of components. Identifying the specific cause of a vacuum leak not only helps in the immediate repair but also aids in preventing future occurrences. Top causes include:

  • Age-Related Wear and Tear: Over time, hoses and gaskets in your car’s vacuum system can deteriorate, leading to leaks.
  • Incorrect Installation of Aftermarket Parts: Improperly installed aftermarket parts can cause seals to fail, resulting in vacuum leaks.
  • Environmental Factors: Extreme weather conditions, such as excessive heat or cold, can cause wear and tear on vacuum hoses and gaskets.
  • Damaged Components: Any damage to components such as intake manifold gaskets, throttle body gaskets, or PCV valves can also lead to vacuum leaks.

The Impact of Vacuum Leaks on Engine Performance

  • Fuel Delivery and Engine Efficiency: Vacuum leaks can mess with the air-fuel ratio, causing your engine to run inefficiently. This leads to poor performance and higher fuel consumption.
  • Long-Term Damage: Ignoring vacuum leaks can result in long-term damage to your engine, potentially leading to costly repairs or even engine replacement.

Guide to Diagnosing Vacuum Leaks

Common Tools:

▶ Vacuum Gauge
▶ Smoke Machine
▶ Spray Bottle with Soap Solution

Instructions:

  1. Visual Inspection: Start by visually inspecting hoses and gaskets for visible cracks or disconnections.
  2. Use a Vacuum Gauge: A vacuum gauge can help you measure the vacuum levels in your engine.
  3. Spray Test: Using a spray bottle filled with soapy water, spray around the suspected areas. Bubbles will form where there is a leak.

DIY vs. Professional Vacuum Leak Repair

Choosing between DIY and professional repair has its pros and cons. DIY is cost-effective and allows for immediate action, but it may lack the expertise needed for a thorough repair. On the other hand, professional repair offers expert diagnosis and repair with a warranty on the work, but it comes at a higher cost and may require leaving your car at the shop.

What to Expect From the Repair Process

  1. Identify the Leak: Use the diagnostic methods mentioned above.
  2. Replace Damaged Parts: Hoses, gaskets, or other components showing wear should be replaced.
  3. Seal the Leak: Use appropriate sealing techniques to ensure the leak is fully closed.

Preventing Future Vacuum Leaks

Maintenance Tips

  • Regular Inspections: Periodically check hoses and gaskets for signs of wear.
  • Quality Parts: Use high-quality parts to reduce the risk of future leaks.

Best Practices for Aftermarket Parts

  • Proper Installation: Ensure that all aftermarket parts are correctly installed to avoid creating new leaks.
  • Consult Professionals: When in doubt, consult a professional for installation.

Conclusion

Addressing vacuum leaks promptly is essential to maintaining your car’s performance and avoiding costly repairs. If you suspect a vacuum leak, don’t delay—either try diagnosing it yourself or seek professional help.

Are you looking for a dependable automotive mechanic to help you with your vacuum leak issues? Contact Northeast Auto Service at 317-475-1846 for professional engine repair in Indianapolis, Indiana, today. Request a free estimate, or schedule service, today.

Related Posts:

10 Common Reasons Your Check Engine Light is On
How to Diagnose a Weak Car Engine
What is an Engine Flush and Do I Need One?

Blown Car Fuse: How to Diagnose, Replace, and Prevent

Understanding the basics of your vehicle’s electrical system is crucial for every car owner. One common issue that often stumps even seasoned drivers is a blown car fuse. A fuse is a small component designed to protect the car’s electrical circuits by cutting off the flow of electricity when there is an overload or short circuit. In this blog post, we will dive deep into everything you need to know about blown car fuses—from diagnosis and replacement to prevention tips.

Call 317-475-1846 For Affordable and Fast Car Fuse Replacement in Indianapolis Indiana

Common Signs of a Blown Fuse

Blown car fuses can manifest in various ways, and recognizing the signs early can save you time and frustration. Here are some common indicators:

  • Electrical Components Not Working: If your car’s radio, power windows, or headlights suddenly stop functioning, a blown fuse might be the culprit.
  • Dim or Flickering Lights: Dimming or flickering lights can indicate an overloaded electrical circuit leading to a blown fuse.
  • No Response from Accessories: Accessories such as the cigarette lighter, GPS, or phone charger not working are tell-tale signs of a blown fuse.
  • Visual Inspection: Removing the fuse and inspecting it can also help. A blown fuse usually has a broken wire or a burnt appearance inside.

Why Fuses Blow: Common Causes and Prevention Tips

Fuses blow for several reasons. Understanding these causes can help you prevent future occurrences:

  • Overloaded Circuit: Plugging too many accessories into one outlet can overload the circuit, causing the fuse to blow.
  • Short Circuits: Damaged wires or faulty electrical components can create a short circuit, resulting in a blown fuse.
  • Aging or Corroded Fuses: Fuses can wear out over time due to corrosion or age.
  • Incorrect Fuse Rating: Using a fuse with the wrong amperage rating can lead to frequent blowing.

Prevention Tips:

  • Regularly check and replace aging fuses.
  • Avoid overloading electrical circuits with too many devices.
  • Ensure you are using the correct fuse rating for each electrical circuit in your vehicle.
  • Regularly inspect wires and electrical components for damage or wear.

How to Replace a Blown Fuse: Step-by-Step Guide for Beginners

Replacing a blown fuse is a simple task that even beginners can handle. Here’s a step-by-step guide:

  1. Identify the Fuse Box: Locate your vehicle’s fuse box. It is usually found under the dashboard or in the engine compartment.
  2. Turn Off the Vehicle: Ensure the car is turned off before you begin to avoid any electrical mishaps.
  3. Access the Fuse Box: Open the fuse box cover and refer to the diagram to identify the fuse linked to the malfunctioning component.
  4. Remove the Blown Fuse: Use a fuse puller or a pair of tweezers to carefully remove the blown fuse.
  5. Inspect the Fuse: Check the fuse to confirm it’s blown (look for a broken wire or a burnt interior).
  6. Install a New Fuse: Replace it with a new fuse of the same amperage rating.
  7. Test the Component: Turn on the vehicle and test the malfunctioning component to ensure it’s working correctly.

When to Seek Professional Help: Indications of a Deeper Electrical Issue

While replacing a fuse is straightforward, sometimes the problem may be more complex. Here are signs that indicate you should seek professional help:

  • No Mechanic Knowledge or Experience: For novices, some things (like auto repair) are best left to the professionals.
  • Frequent Blowing of Fuses: If fuses blow frequently, there could be an underlying electrical issue that needs professional diagnosis.
  • Burning Smell or Smoke Odors: A burning smell or smoke odor indicates a severe electrical problem requiring immediate professional attention.
  • Multiple Electrical Failures: If several electrical components fail simultaneously, it could suggest a deeper issue within the vehicle’s electrical system.
  • Complex Electrical Systems: Modern vehicles have complex electrical systems that may require advanced diagnostics tools and expertise.

Key Notes

Regular vehicle maintenance and electrical system checks are pivotal in preventing issues like blown fuses. Not only do these practices ensure your car remains in optimal condition, but they also enhance your safety on the road. Make it a habit to inspect your vehicle’s electrical components periodically and address any irregularities promptly.

If you have encountered a blown fuse or want to learn more about maintaining your vehicle’s electrical system, don’t hesitate to reach out for professional advice. Contact Northeast Auto Service at 317-475-1846 for professional automotive service and repair in Indianapolis, Indiana. Request a free estimate, or schedule service, today.

Related Posts:

How to Diagnose and Solve Common Auto Electrical Problems
10 Common Reasons Your Check Engine Light is On
How Much Does Alternator Repair Cost?

Sailing Smooth: Navigating Common Cruise Control Issues

When it comes to convenience features in modern vehicles, cruise control tops the list for many drivers. This system, which allows you to maintain a set speed without having to keep your foot on the gas, can be a real game-changer for long road trips or daily commutes on the highway. However, like any other automotive technology, cruise control systems are not immune to issues. Drivers often find themselves grappling with malfunctions that can quickly turn a smooth ride into a stressful one.

Understanding the common problems with cruise control and how to address them is crucial for vehicle owners who value the reliability of their driving experience. This guide will help you steer clear of cruise control woes, ensuring that your journeys remain as untroubled as possible. Whether you’re a car enthusiast who loves to DIY or a general commuter seeking to improve your car knowledge, the insights shared here will be invaluable.

Call 317-475-1846 For Cruise Control Repair in Indianapolis Indiana

Unpacking the Most Common Cruise Control Woes

“Set it and forget it” is the mantra of cruise control systems, but sometimes, they just refuse to play along. Here’s a look at what can go wrong.

Inactive Cruise Control Lights

You set your desired speed and expect the green light to signal that cruise control is working, but instead, you’re met with a blank dashboard. An inactive cruise control light is one of the most confounding issues drivers face. The simplest cause could be a blown fuse, a trivial fix. However, it might also indicate deeper electrical faults or a malfunctioning switch.

Unreliable Speed Holding

A more insidious problem arises when the system can’t maintain the selected speed, leading to fluctuations and the dreaded speed-up, slow-down cycle. Mechanical issues such as throttle cables or vacuum leaks could be at fault here.

Sudden Disengagement

Just as you settle into your highway stint, the cruise control disengages unexpectedly, forcing you to regain control. This can be caused by sensor glitches or dangerous situations like steep inclines or hard turns.

Analyzing the Causes and Seeking Solutions

Understanding the root cause of your cruise control problem is the first step toward finding a solution.

DIY Troubleshooting

Do a simple check of the fuses. Replace any blown ones with new ones of the same rating. Inspect the cruise control switch on the steering wheel — is it sticky or unresponsive? A good cleaning or, if necessary, replacement could be in order.

To diagnose speed-holding issues, look for cracks or leaks in the vacuum lines connected to the control system. These can be patched up with little cost and effort, restoring smooth operation.

When to Call in the Pros

For more complex issues like sensor or module malfunctions, it’s usually best to consult a professional. They’ll have the diagnostic tools and expertise to pinpoint and rectify the problem. Investing in a good repair manual tailored to your vehicle’s model can also guide you or your mechanic through the process.

The True Value of Regular Vehicle Maintenance

Prevention is often preferable to cure, and the case of cruise control systems is no different. Routine maintenance not only keeps your car in excellent running condition but also helps to avoid frustrating breakdowns in the systems you rely on every day.

The Role of System Checks

When was the last time you had your vehicle’s systems thoroughly checked? Staying on top of regular maintenance ensures that potential problems are spotted early and rectified before they escalate. A systematic approach to maintenance, involving checks of all electronic and mechanical systems, can prevent the majority of cruise control issues.

DIY Maintenance Tips

There are several simple steps you can take to keep your cruise control functioning well. Periodically checking the vacuum lines for wear and tear, keeping the electrical components clean and dry, and ensuring that your vehicle’s computer systems are up to date with the latest software can go a long way.

Wrapping Up

Your car’s cruise control system, like any other aspect of your vehicle, requires attention and care to function properly. By understanding the common issues that can arise, troubleshooting them effectively, and investing in regular maintenance, you’re taking control of a smoother, more enjoyable driving experience.

It’s important to remember that improper functioning of any system in your vehicle can be a symptom of larger problems. Don’t ignore the signs, and don’t hesitate to seek professional guidance. Your local automotive repair shop is a wealth of knowledge that’s just a visit or call away.

If cruise control issues are currently casting a shadow over your drives, it’s time to regain that sense of seamless control. Contact Northeast Auto Service at 317-475-1846 and book a maintenance service and take the first steps toward a more assured and effortless automotive experience.

Related Posts:

Navigating Car Sensor Issues: Tips and Tricks
How to Diagnose and Solve Common Auto Electrical Problems
10 Common Reasons Your Check Engine Light is On
No Panic Guide: Navigating a Sudden Car Breakdown

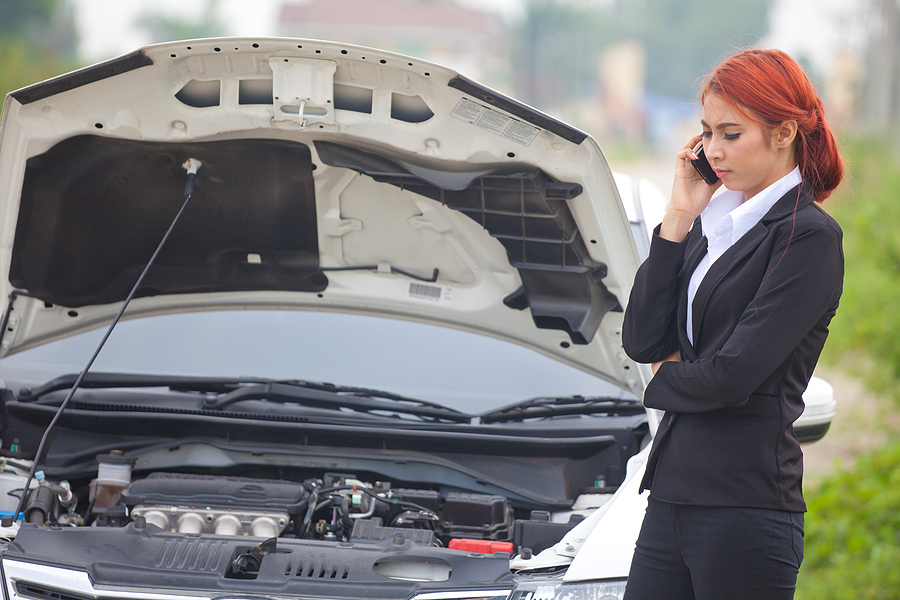
Imagine you’re driving, music playing in the background, thoughts meandering to the plans for the weekend, and suddenly, your car decides to throw a wrench into your well-laid plans—a breakdown, out of nowhere! It’s an inconvenient reality for any motorist, and whether you’re a seasoned driver or a beginner behind the wheel, the sudden halt can send anyone into a panic. But fear not!

This post is here to equip you with the knowledge and steps to handle such unanticipated hitches with ease. From assessing the situation calmly to getting back on the road safely, we’ll guide you through the essentials of managing a car breakdown without breaking a sweat. Let’s dive in!

Call 317-475-1846 For Affordable Car Repair in Indianapolis Indiana

Steps to Take After Your Car Breaks Down

Stay Calm and Assess the Situation

The first and most vital step is to stay relaxed and gauge the situation. Panicking can fog up your judgment and lead to poor decisions, causing more harm than good. Take a deep breath, turn on your hazard lights, and pull over to a safe spot away from traffic. If you’re on a highway, try to reach the nearest exit or a rest area. Once you’ve stopped, turn off your engine and step out of the car to inspect it.

Check for Warning Signs: Look for any warning lights on your dashboard that may indicate what’s wrong with your vehicle. It could be an issue with the engine, battery, or any other component.

Listen for Unusual Sounds: If you hear any strange sounds like grinding, clicking, or knocking, it’s a sign that something may be wrong with your car.

Smell for Strange Odors: A burning smell could indicate an overheated engine or electrical issues. A sweet smell could mean a coolant leak.

Contact 911 if Necessary

If the situation seems dangerous or out of your control, immediately call 911 emergency services. In case of an accident, injuries, or if you’re stuck in a remote area, it’s best to seek professional help from paramedics and police officers. You can also reach out to your roadside assistance provider for guidance and support.

Take Proper Safety Measures

If you’re unable to move your vehicle off the road or if it’s nighttime, make sure you and your passengers are safe by taking the necessary precautions:

Inform Someone of Your Whereabouts: If you’re stranded in an unfamiliar location, make sure to inform a friend or family member of your whereabouts.

Use Reflective Triangles or Flares: Place them a few feet behind your car to warn other drivers of your presence.

Stay Away from Traffic: Stay on the side of the road and avoid standing in front of or behind your vehicle.

Contact Roadside Assistance: If you have any emergency tools like a spare tire or jack, try to fix the issue yourself. But if you are not confident, have no idea what’s wrong with your vehicle, or don’t have the necessary tools, it’s best to contact a roadside assistance service.

Call a Towing Service: If your vehicle is not drivable, contact a towing company and have your car towed to your home or to a reputable auto repair shop.

Diagnose Your Automotive Problem

If you cannot determine the cause of the breakdown, you will need to have it checked out and repaired by a licensed mechanic.  Here’s what to expect from that process:

Describe the Problem: When you contact a mechanic, be sure to describe your vehicle’s issue in detail. This information can help them diagnose and fix the problem quickly.

Ask for an Estimate: Ask for a rough estimate of how much it will cost to fix the issue before starting any repairs. This way, you can avoid any unexpected costs.

Request Regular Updates: While your car is being repaired, request regular updates from the mechanic. This will keep you informed of the progress and any additional issues that may arise.

Prepare for Future Breakdowns

A car breakdown can happen to anyone at any time, so it’s essential to be prepared. Here are some tips to avoid and handle future automotive breakdowns:

Regular Maintenance: Get your car serviced regularly and keep up with routine maintenance, like oil changes, tire rotations, and more.

Carry Emergency Supplies: Keep an emergency kit in your car with items like a first aid kit, flashlight, spare tire, and jumper cables.

Be a Good Driver: Avoid aggressive driving and follow traffic rules to reduce the risk of accidents or breakdowns.

In Summary

A car breakdown can be a stressful experience, but with the right knowledge and preparation, you can handle it calmly and safely. Remember to stay calm, assess the situation, contact emergency services if needed, take safety measures, and get your car diagnosed and repaired by a professional. And most importantly, don’t forget to prepare for future breakdowns by regularly maintaining your vehicle and carrying necessary emergency supplies. With these tips in mind, you’ll be well-equipped to navigate any sudden car breakdown without any panic.

Are you looking for dependable and affordable automotive diagnostics for a sudden car breakdown? Contact Northeast Auto Service at 317-475-1846 for professional automotive service and repair in Indianapolis, Indiana. Request a free estimate, or schedule service, today.

Related Posts:

My Car Broke Down! Now What? A Comprehensive Guide
Top 4 Reasons Why Your Car Won’t Start
How to Diagnose and Solve Common Auto Electrical Problems

Demystifying Fuel System Repairs: A Comprehensive Guide

For many vehicle owners, the concept of fuel system repairs can seem daunting and overly technical. However, understanding the basic components and functions can significantly simplify the process. In this guide, we will delve into the intricacies of your vehicle’s fuel system, demystifying elements such as fuel pumps, fuel filters, fuel lines, gaskets, carburetors, and tanks.

We’ll explore common fuel pressure problems and discuss preventive measures for maintaining an optimal fuel system. Additionally, we’ll provide insight into the average costs of fuel line and tank replacement. Whether you’re interested in fuel system repair, fuel injection service, or carburetor repair, this guide offers comprehensive information to keep you in the driver’s seat of your vehicle’s health. Buckle up as we journey into the heart of your vehicle’s fuel system.

Call 317-475-1846 For Affordable Fuel System Repair and Service in Indianapolis

The Role of Fuel Pumps in Cars

At the core of your vehicle’s fuel system is the fuel pump. This essential component is responsible for transferring fuel from the tank to the engine. In modern vehicles, fuel pumps are typically located inside the gas tank and utilize an electric motor to generate pressure to push fuel through the lines. Issues with a faulty or failing fuel pump can result in insufficient fuel supply to the engine, causing a variety of performance problems.

Signs of a failing fuel pump may include difficulty starting the vehicle, hesitation or sputtering while accelerating, and stalling while driving. Regular maintenance and timely replacement when needed can prevent costly repairs down the road.

Fuel Filters

Fuel filters serve as a protective barrier between your vehicle’s engine and any harmful debris or impurities that may be present in the fuel. As the fuel flows through the filter, it traps any contaminants, preventing them from entering the engine. Over time, these filters can become clogged, reducing fuel flow, and potentially causing damage to your engine. Regularly replacing fuel filters is crucial for maintaining a healthy fuel system.

Fuel Lines

Fuel lines are the arteries of your vehicle’s fuel system, carrying fuel from the tank to the engine. These lines are typically made of rubber or plastic and can become corroded or damaged over time. Corroded fuel lines can cause leaks, leading to potential safety hazards and costly repairs.

Gaskets

Gaskets act as seals between different components of the fuel system, preventing leaks and maintaining proper pressure. Regular inspections and timely replacements of worn or damaged fuel lines and gaskets are essential for optimal performance.

Carburetors

Carburetors were once a standard component in all vehicles but have since been replaced by fuel injectors in most modern cars. However, they’re still found in some older vehicles and can experience problems similar to fuel injectors, such as clogs or leaks. Carburetor repairs often involve cleaning or rebuilding the component, but they may also require replacement if they are beyond repair.

Preventing Fuel Pressure Problems

Fuel pressure problems can occur due to a variety of issues, including a malfunctioning fuel pump, clogged fuel lines, or a faulty fuel pressure regulator. These problems can lead to poor engine performance, reduced fuel efficiency, and potential safety hazards. Regular maintenance and prompt repairs are essential for preventing these issues.

Fuel Line and Tank Replacement Cost

The cost of repairing or replacing components within the fuel system can vary significantly depending on the make and model of your vehicle, as well as the severity of the problem. On average, a fuel line replacement can cost between $150 and $200, while tank replacement can range from $1,000 to $2,000. However, regular maintenance and timely repairs can help avoid these costly expenses.

In Conclusion

A clear understanding of your vehicle’s fuel system is crucial for maintaining its health and efficiency. Regular maintenance and prompt repairs can prevent costly fuel system problems, ensuring your vehicle runs smoothly and reliably. Whether you’re in need of fuel system repair, fuel injection service, or carburetor repair, this comprehensive guide has provided you with the knowledge to make informed decisions about your vehicle’s fuel system.

Remember to always consult a professional mechanic for any repairs or replacements needed to keep your vehicle running at its best. Contact Northeast Auto Service at 317-475-1846 for professional fuel system repair and service in Indianapolis, Indiana. Request a free estimate, or schedule service, today.

Related Posts:

What is a Fuel Conditioner and Should I Use One?
How to Tell if Your Car Needs Fuel Induction Service
Difference Between Return and Returnless Fuel Systems